Your craft room can be modern, beautiful AND functional with these DIY Cricut Decor Ideas! Includes ready to make projects in Cricut Design Space so you can recreate any of these in your own home office!
This is a sponsored conversation written by me on behalf of Cricut. The opinions and text are all mine.
Some of you may not know, but we put our Arizona home up for sale and moved to Colorado. We decided to move the week before Christmas, had family over the week of Christmas, spent the week after with more family, then moved a week after that.
It was pure insanity, but I’m happy to say we LOVE Colorado and our new home is coming together nicely! I started with my Office and today I have some Cricut Craft Room DIY Decor Ideas to share with you!
Want to see my previous craft room? Check it out here…and you can see a lot of similarities. Since we’re in a rental, I didn’t want to invest too much into it, since I’m not sure what our next home space will look like. Also, vinyl is a great thing for rentals…so easy to remove!
Cricut DIY Craft Room Ideas
I used my Cricut Maker and paired it with my EasyPress 2 with some super functional office decor ideas. I’m all for pretty things, but the added bonus of functional storage space makes me swoooooon.
Office DIY Cricut Craft Room Ideas
I usually have a messy desk, so I keep the decor items on my desk to a minimum. They usually can’t compete with all the paperwork and drawings.
But, I did want to make a cute little notebook that I could draw or write in if I needed too. I cut out some Cricut Leather with the knife blade, then added a geometric shape with Adhesive Foil. The holes were and binding were made with the Cinch. It’s such an easy project and I love that you could personalize it any way you like.
I also wanted to make sure I had PLENTY of space for my vinyl and iron-on. I placed two hanging baskets on the wall for the rolls that I’ve already opened, and store the unopened rolls in a rolling cart I got from The Container Store.
This solution works wonderfully for me. I have A LOT of vinyl and this keeps things manageable!
Vinyl Wall Labels
Can’t have a Cricut Craft room without some vinyl storage, right?
I also placed some fake succulents on the hanging baskets. It was one of those last minute things…I borrowed them from some living room decor and now I need to buy more succulents for that space. Ha!
Before we moved, I had a photography studio with a similar setup, and you can see a little behind the scenes preview on my Instagram page.
While I miss that space, I’m glad I came up with a great solution for our rental, since we’ll be here for another year or two…I want a house, but I DEFINITELY am not in any hurry to move again!
I wanted to do something really fun and different for my Cricut Craft Room, so I made this really pretty wood clock and ironed on some black glitter vinyl to it with my EasyPress 2.
It is a small clock that I got at Target, so to fill the space on the wall, I placed my favorite Succulent wreath over it. I love that it adds some color and greenery always makes a space feel more like home.
One of my FAVORITE things about my new office is my son’s play space. He is four and stays home with me while the kids go to school.
He sticks to me like glue, so I wanted to have a spot for him where he could play and talk and I can keep an eye on him. Our floorplan isn’t as open as my last house, so this works wonderfully. Though, it doesn’t look NEAR this neat when he’s in here 😉
I have some cute pillows that I had in my previous office, laid down a rug I’ve been eyeing for forever, and a basket he can use for clean up.
DIY Wood Blocks
I also made the wood blocks with my EasyPress 2. Grab the EasyPress settings guide I created so you know the time, heat and iron-on you can use on wood projects. Iron-0n works better than vinyl for these blocks because it WILL NOT budge. You don’t have to worry about any letters or shapes falling off.
Storage is SUPER important for a craft room. Since this office is right by the front door, I wanted it to have the function of a craft room, but the look of a home office. So, I have shelf space that I decorated with plants and pots, but it also has all my paper and art supplies.
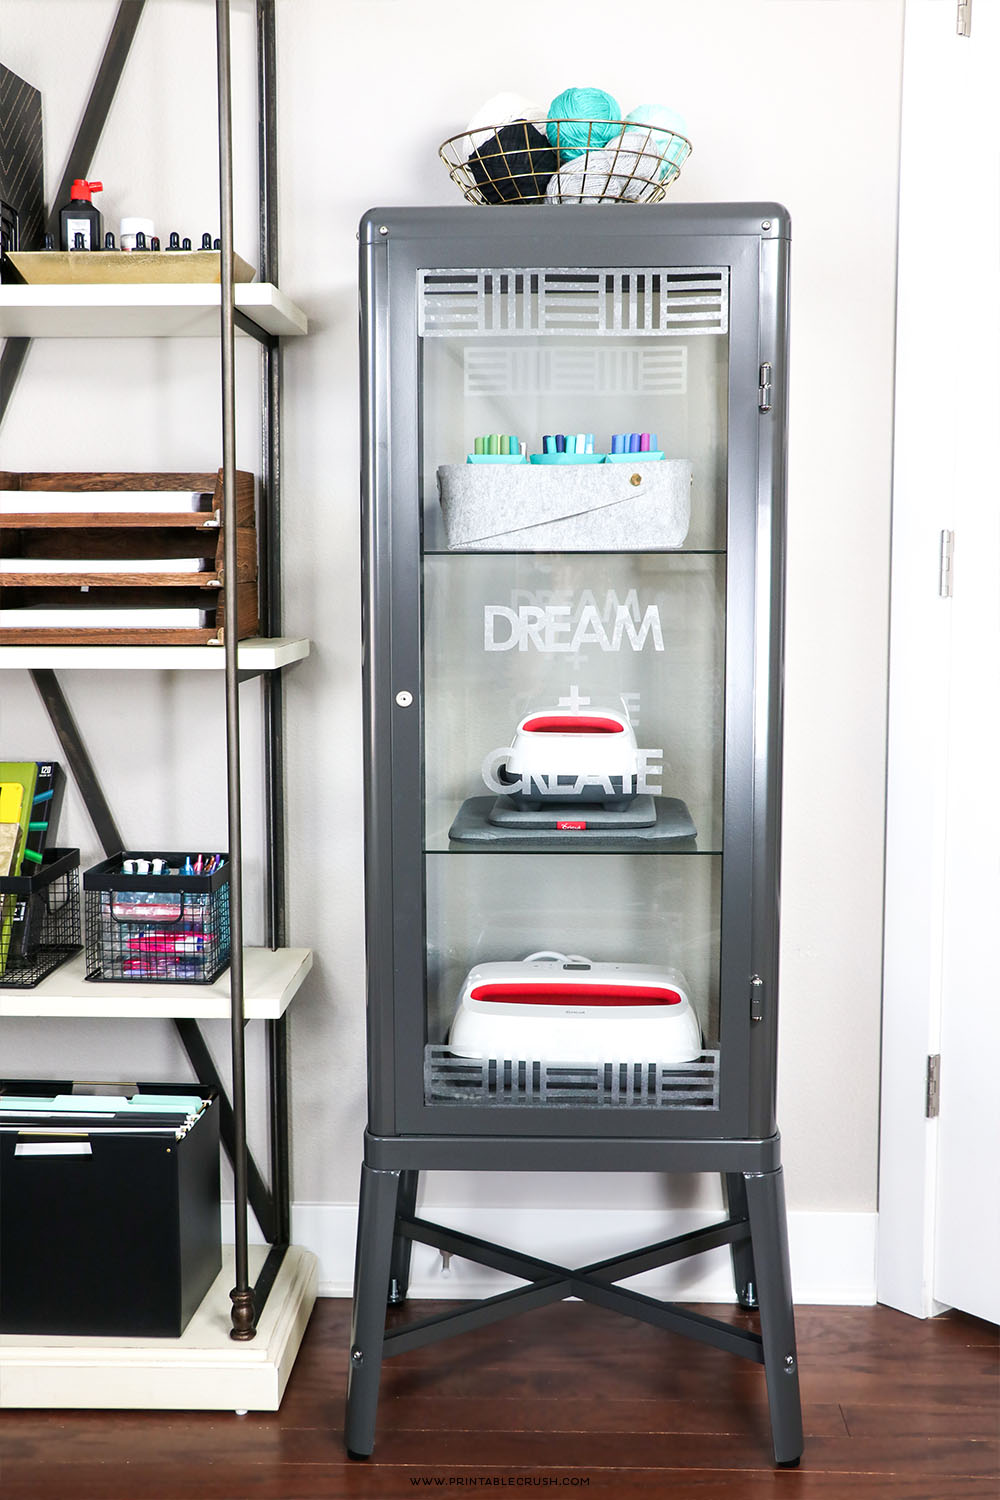
I also got a cute Vintage looking display case to store my two EasyPress 2s and used Window Cling to add the fun geometric border and quote. Isn’t it too pretty?
I like that it adds a fun element to my office, but it’s still clean and modern – just how I like my creative space.
If you have something this would work for, click on the link below, then click CUSTOMIZE and adjust the sizing accordingly.
I also used my glass case to store my Cricut pens. I have multiple sets, so I made six geometric vases out of paper and used my Cricut Scoring Wheel to make them easy to fold.
Since markers can be heavy and paper isn’t quite as sturdy, I placed them in some fabric storage containers from IKEA. Such a simple thing, but SO cute and a super functional addition to my Craft Room DIY Decor.
You can see my roll cart in the image below. Vinyl takes up most of the cart, I reserved the top drawer for Cricut tools. I use the second drawer for Cricut mats.
I made some paper boxes for those, as well…that way they’re sectioned off by the type of Cricut tool. It is pretty much the most inexpensive way to divide drawers. 10 cents per box? I’ll take it!
And even though this is a Cricut Craft Room, I have a bajillion markers for hand lettering and wanted to display all those pretty colors.
I got this hanging storage bin at IKEA, tied some macrame rope to the pole holding up the bucket. Then I put some markers in some mason jars.
Oh man, I love the mix of textures in this space.
The wood, black fabric, metal, greenery, mixed with my art supplies just makes my heart happy.
Get CREATIVE with your Cricut Craft Room DIY Decor
I wasn’t expecting to love my Cricut Craft room as much as I do. There were many tears shed as I said goodbye to my Arizona office. More tears when I came here and didn’t think I could make it work.
But sometimes when you’re struggling, that’s when you get the most creative, right?
If you’d like to share something from my blog, please feel free to share one image and then link back to my post where people can read the full tutorial/content.please do not alter or copy photos nor copy my work in its entirety to share on your site without my permission. View my full disclosure, TOS, and privacy policies.


Elise Laney says
I love the cabinet for the EasyPresses! Stylish and functional.